Tuesday, April 29, 2014

My must have Makeup Brushes for The Face


I believe that if you want your makeup to look good you need the right brushes to achieve a flawless look. A good brush can make a world of difference when applying your face makeup.  Ive narrowed down my top five must have face brushes that I can't live without. Enjoy xoxo

Starting from the left 

Sigma F80 Flat Top Kabuki Brush-  If you haven't tried Sigma brushes yet, you need too. These brushes are affordable and made really well. They're very comparable to M.A.C. brushes. I can't get enough of this brush! It makes putting on your foundation a breeze. The brush is super soft and dense, making your skin look flawless. This brush blends everything in so easily giving you that airbrushed finish. When I want a full coverage foundation look, this is my go to brush.
http://www.sigmabeauty.com/Sigma_Flat_Top_Synthetic_Kabuki_F_80_p/f80.htm

Sonia Kashuk Small Duo Fiber Multipurpose Brush #124- I think her brushes are amazing! Super affordable and well made.  I use this brush with a translucent powder to set my foundation. The bristles are soft and they don't hold a lot of product so it doesn't cake the product on to your face.
http://www.target.com/p/sonia-kashuk-core-tools-small-duo-fibre-multipurpose-brush-no-124/-/A-13339924?reco=Rec|pdp|13339924|ClickCP|item_page.vertical_1&lnk=Rec|pdp|ClickCP|item_page.vertical_1

M.A.C. 187 Duo Fiber Face Brush- this brush does it all! Kinda on the pricey side but worth every penny. I use this brush to apply powder to set my foundation. Or, when I want to blend out my bronzer or blush so there's not any harsh lines. I've recently started to use this brush for blush too! It lightly applies the blush giving you a more natural look. A must have!!
http://www.maccosmetics.com/product/146/772/Products/Brushes/Face/187-Duo-Fibre-Face-Brush/index.tmpl

E.l.f. Studio small Stippling Brush- this is a lot different than the other two stippling brushes I just mentioned. It's really dense , almost like the sigma brush. I use this to blend out my concealer under my eye. It's perfect because its small for the eye area. I also use it to blend out a cream contour because its nice and small to fit into the hollows of my cheeks. The greatest thing about this brush, it's only $3!!!! Can't beat that! 
M.A.C. 168 Angled Contour Brush- Great brush for contouring or just for applying blush. I use this for both actually. The angle helps you get into the hollows of your cheeks for that beautiful blended out contour.
http://www.maccosmetics.com/product/146/324/Products/Brushes/Face/168-Large-Angled-Contour-Brush/index.tmpl

The Beauty Blender- I'm obsessed with this little guy right now. When I want a more sheer look to my foundation I use this. Which is pretty much everyday. You just get it damp and pat (not rub) your foundation on. The smaller point is great to blend out my concealer and get into those hard to reach places. It's amazing.
http://www.sephora.com/beautyblender-P228913#BVRRWidgetID




Thursday, April 24, 2014

Pallet Planter DIY


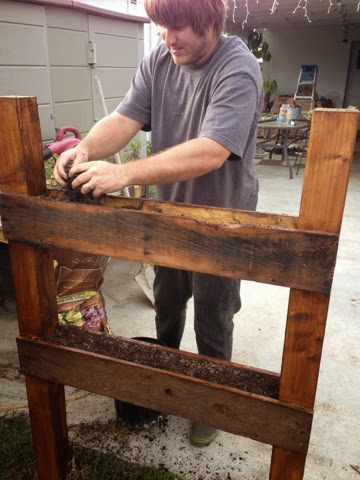
I love growing herbs and strawberries! I have different pots and planters all over my backyard. I wanted something that could hold more than one herb or strawberry plant in one planter or pot. I know they make longer planter boxes but what's the fun in just buying one when you can make one?? Special thanks to my hubby who helps me build everything!! He's the best! Enjoy xoxo 

How cute is Budi helping his dad? 
After it was assembled I threw a wood stain on it.
Dig a hole and "plant" your new planter! 
Throw some soil into it with your plants, water and you're good to go! 
I love the way it came out! We're making another one with more shelves too! It's the perfect height and makes it convenient to just pick off whatever I need. 

Wednesday, March 26, 2014

Delicious Chicken Pot Pie


Hey guys!! Sorry I've been M.I.A. I've been super busy with work, school and I got married! I have tons of things I want to blog about but I thought I'd throw this delicious Chicken Pot Pie Recipe up really fast. This is comfort food at its best! It's very easy to make, just time consuming. Enjoy!


 First I start off by roasting two bone in chicken breast in a 375 degree oven for 40-50 minutes. I rubbed each breast with olive oil and salt and pepper. When the chicken is done, cool, then cut off all the chicken from the bone. Cut carrots, and celery. Put in a pot along with frozen peas and cover with enough chicken broth to cover all the veggies. Bring to a boil and cook until veggies are tender but still crisp. Drain veggies from the broth, reserve the broth to use for later.
Put a pie crust in a glass pie dish. I put the pie crust into the oven for 6 minutes. Take out of the oven and put chicken and veggies into the bottom of the pie crust.
In a saucepan over medium high heat cook onions in butter until translucent. Stir in flour, salt, pepper, garlic salt, onion powder and garlic. Slowly stir in chicken broth and milk. Simmer until thick.

Pour mixture over the chicken and veggies until it's almost overflowing. Cover with top crust, seal edges, and cut away any excess dough. Make several small slits in the top to allow steam to escape.Brush the pie crust with egg whites. Bake in the preheated oven for 45-60 minutes or until pie crust is golden brown. Cool for 10-15 minutes before serving. Then eat!!

 Chicken Pot Pie
 2 Bone in Chicken Breast
1 cup peeled and sliced carrots
1 cup frozen green peas
1/2 cup sliced celery
1 cup of diced onion
2/3 cups of butter
2/3 cups of all-purpose flour
1 teaspoon salt
1 teaspoon of black pepper
1 tablespoon of garlic salt
1 tablespoon of onion power
1 tablespoon of garlic
3 cups of chicken broth
1 1/3 cups of milk
2  9 inch unbaked pie crusts

Wednesday, March 5, 2014

My Favorite Lush Cosmetics Products


I love products that are natural and good for your skin. Lush Cosmetics has some of the best, natural products I've ever come across. When you walk into a store it smells so amazing! They have something for everyone and every skin type. These are my favorite products from them.

  
My top three products that I will never go without are the Tea Tree Water, Vanishing Cream, and the Mask of Magnaminty.
Tea Tree Water-  Is a spray on toner water. I use this after I've cleansed my face as my toner. It helps balance my skin's PH, helps control my oily skin, prevents breakouts and doesn't dry my skin out. I use it morning and night. Tea Tree is an antibacterial and antifungal to help with imperfections. This product doesn't contain alcohol like most toners do so it's perfect for my sensitive skin. The smell is amazing too!
$9.95-$21.95
Vanishing Cream- Is a light but very moisturizing face moisturizer. I have oily skin and this works perfectly with it. I love the natural witch hazel in this product because it helps to tighten pores. It also has shea butter in it so it doesn't leave any residue that some products can leave on your skin. I don't use this during the day because I feel like its too thick for the day time so it's my nightly night cream. In the morning my face is hydrated and plump. I love it! 
$42.95
Mask of Magnaminty- Probably my all time favorite face mask! (and I've tried a bunch) I can't even describe how good this mask is, but I'll try. The moment you put this mask on your skin you can feel it working. You apply a thick layer on your skin and leave it on for 5-10 minutes. It has peppermint in it which helps stimulate your skin and pull out all the impurities. The main ingredient is bentonite gel which deep cleans pores and tightens them at the same time. It contains loads of aduki beans to exfoliate flaky or dry skin, vanilla absolute to calm redness and honey to soothe. You can also use the mask on your back and chest. This mask literary has it all and is good for all skin types. When you rinse it off your skin feels super clean and fresh like its still on your face! Since using this product I've noticed my skin is brighter and my acne scars have faded a lot!  
$24.95

I wanted to include this picture just so you can see the texture of the mask. It's amazing!
 I've tried other products from them but I can't say they're my favorite.
Grease Lighting- is a tea tree gel that helps fight breakouts. It worked ok, but I love my Mario Badescu Drying Lotion to help dry up my pimples. 
$13.95
Big Shampoo- is a sea salt shampoo. I just found it really drying on my hair. It has a small lather but not as much as I like. 
$26.95
Cosmetic Warrior Fresh Face Mask- this mask just smelled funny to me. I didn't see any results other then it just felt good on my skin. After using the mask of magnaminty no other mask comes close to it! The fresh masks only last about two weeks and has to be kept in your fridge because it's made with all natural food products. 
$6.95

Thanks for stopping by! XoXo

Wednesday, February 26, 2014

DIY Mason Jar Soap Dispensers


I was tired of looking at my plastic bottles of dish and hand soaps at my kitchen sink. The bottles are ugly and I hate storing them under the sink because its a pain in the butt to grab them every time I want to wash the dishes or my hands. I figured let's use mason jars instead of ugly plastic bottles. This project was easy thanks to Danny of course! He taught me how to use the drill but I think he secretly likes helping me on all my projects! Love you babe. So here's how to make these cute mason jar soap dispensers.

First you have to find pumps that you want to use for each jar. I found the top two pumps at the Dollar Tree attached to a bathroom sink soap dispenser. I had to make sure the plastic part on the pumps that goes into the jar would be the right length for my mason jars. The other pump was off of an old Soft Soap dispenser I had laying around the house. Tape off the plastic parts under the pumps to get ready to spray paint. 
Danny helped me drill the right size holes in order to get the pumps to fit tightly onto the lids of the mason jars. Once this is done, it's time to spray paint. 
The color spray paint I used was dark bronze. I let the first cost dry for an hour and the second coat overnight. 
Next it's time to attach the lids and pumps. Put the glue on the bottom of the lid where the lid and pump come together.  We used a waterproof adhesive and let this dry overnight. Than attach the pump, lid and band onto your mason jar full of soap and you're good to go!! Super easy and way cuter then plastic bottles! Xoxo


Thursday, February 20, 2014

Easy DIY Succulent Planter


Succulents are my favorite thing to grow. Mostly because I can't keep anything else alive. Danny's got the green thumb, thankfully! I have tons of succulents growing outside on my patio and wanted to use them to add some plant life in my house. The cool thing about succulents is that you don't have to water them a lot! Perfect for me! I did this project in less then 20 minutes.


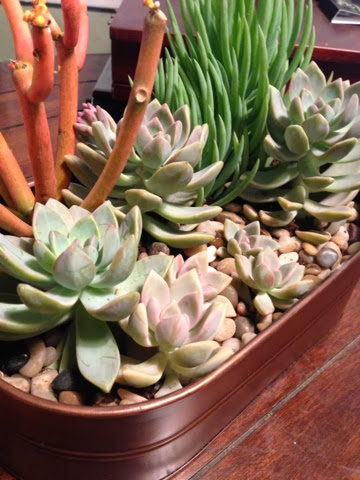
I found this cute, bronzed container at my local goodwill store for $2. I found the rocks at the dollar tree and only needed two bags for this project. Scatter the rocks on the bottom of your container so that none of the container is showing. Since my container doesn't have any drainage holes for when I water, the rocks act as my drainage pan so mold and root rot doesn't occur. 


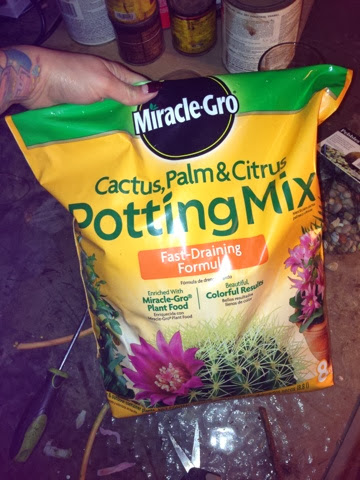
 Fill up your container with cactus potting soil. I went around my backyard and cut the succulents that I wanted to use for this. If you don't have any you can always buy some. They are really inexpensive. Succulents are great because you can cut them off from the original plant and replant them. Just plant the succulents however you want. After I had them planted I put smaller rocks anywhere that the soil showed through. Water and you're done! Super easy and super cute! I only water these once a week by using a spray bottle just to get the soil moist. They don't require tons of water. They like some light so keep them in a bright part of your house, just not in direct sunlight. Enjoy! XoXo


Monday, February 17, 2014

Easy Spinach Cubes for Healthy Smoothies


Fresh, organic spinach is something I can't live without. It's on my grocery list every time I go shopping. I use spinach instead of lettuce for everything. Salads, sandwiches, and for my protein shakes or smoothies. I buy spinach in bulk because its cheaper. Thing is, I can't use it enough before it starts to go bad. Solution, easy spinach ice cubes. Lets get started.

Wash your spinach well and break into pieces. Put the spinach into a food processor with 1/4 cup of water. 

Blend until the spinach is chopped well, and mixes in with the water. It's ok to have chunks of spinach. 

Put the spinach mixture into ice cube trays and freeze overnight. Pop those babies out and put into a zip-lock bag. When you're ready to use them just place 2-3 cubes into your blender along with your other smoothie ingredients, blend and enjoy! You can also use these whenever you need to use spinach. Just defrost or place into your hot pan. Spinach is and anti-inflammatory and is loaded with antioxidants. These spinach cubes make it really easy to get your veggies into your diet. Hope you enjoy!